To turn rough pieces of wood into perfectly straight lumber, you no longer need to hire a craftsman. These days, you just need to have a jointer and know how to use it properly to make quality cuts with minimal safety risks.
Well, if you’ve got your first-ever jointer and don’t quite know how to use it, then let us introduce you to the step-by-step process of wood jointing. We’ll give you some general tips on correct usage, but keep in mind that you may develop your own strategies as you are gaining more and more experience with jointing.
Read More: Best Jointers For The Money
How To Properly Use A Jointer
1. Don’t confuse a jointer with a planer.
First and foremost, do not confuse a jointer with a planer. These two tools have very different purposes, though they actually complement each other.
The purpose of a jointer is to get the surface of the wood piece flat and straight. Then, you place the wood piece in a planer with the flat face against the bed, and you slide the piece through the planer to flatten the reverse side and ensure that the thickness of the wood is even throughout its surface.
Being able to differentiate between a jointer and planer is important because these tools are very often used together, and if you want to get a perfectly flat and straight piece of wood, you need both tools.
2. Set up your jointer correctly.
Setting up your jointer correctly is pretty important to make sure that the tool is doing what you want. Here is what you will need to do before starting jointing the wood:
• Make sure that the infeed and outfeed tables are perfectly coplanar (i.e. the top of the infeed and outfeed tables are parallel). Otherwise, you will not be able to achieve a flat, straight cut.
You may use a straight edge to check the position of the tables and adjust it if necessary. The tables should be set to the same height setting for this test.
• Ensure that the fence is perfectly upright (i.e. at 90 degrees to the bed surface). You may use a measurement square or a digital angle gauge to determine the angle of the fence. The same applies if you want to keep the fence beveled at 45 degrees.
• Position the outfeed table level with the top of the cutter head knives at their highest point. This will ensure a straight and flat cut. Then, adjust the height of the infeed table – the difference between the heights of the infeed and outfeed tables will determine the depth of the cut.
3. Do not set the cut too deep.
If your jointer can make 1/8-inch deep cuts, it doesn’t mean that you should try to push the tool to its limits.
High-end jointers may be able to continuously cut at their peak capacity. But with inexpensive jointers, pushing the depth of cut too far will be too straining on the motor.
1/16 of an inch is a cut depth that should be manageable by most jointers no matter their motor power.
4. Do not mill too large/small pieces of wood.
You should mill neither too large nor too small pieces of wood with your jointer.
As a rule of thumb, if the wood piece is twice the length of your jointer’s bed, then you should try to set up auxiliary supports at both ends of the jointer.
As for small workpieces, you shouldn’t mill small stock because it will be more difficult to control. With most machines, the minimum stock size is 1/2 x 2 x 12 inches (H x W x L), but check your jointer’s manual to see if there are more specific size guidelines.
5. Position the wood properly.
To allow your jointer to more easily mill through the wood, you should place the wood so that the grain direction is opposite to the feed direction.
The cutter head in your jointer rotates in your direction, and by facing the grain towards you, you will allow the knives to cut along the grain rather than against it. Aside from stressing the motor less, correct feeding will prolong the life of the knives and reduce tearout.
6. Start with face jointing.
Remember that you should joint the face of the workpiece first. This applies regardless of whether you need to edge joint or not. Jointing one of the faces of the workpiece gives you a flat surface that can be firmly placed against the fence. This will allow for higher-quality edge jointing.
Another thing to keep in mind is that it’s more reasonable to start on the face that’s less crooked. After you’ve made it flat, the other side will be very easy to flatten on a planer.
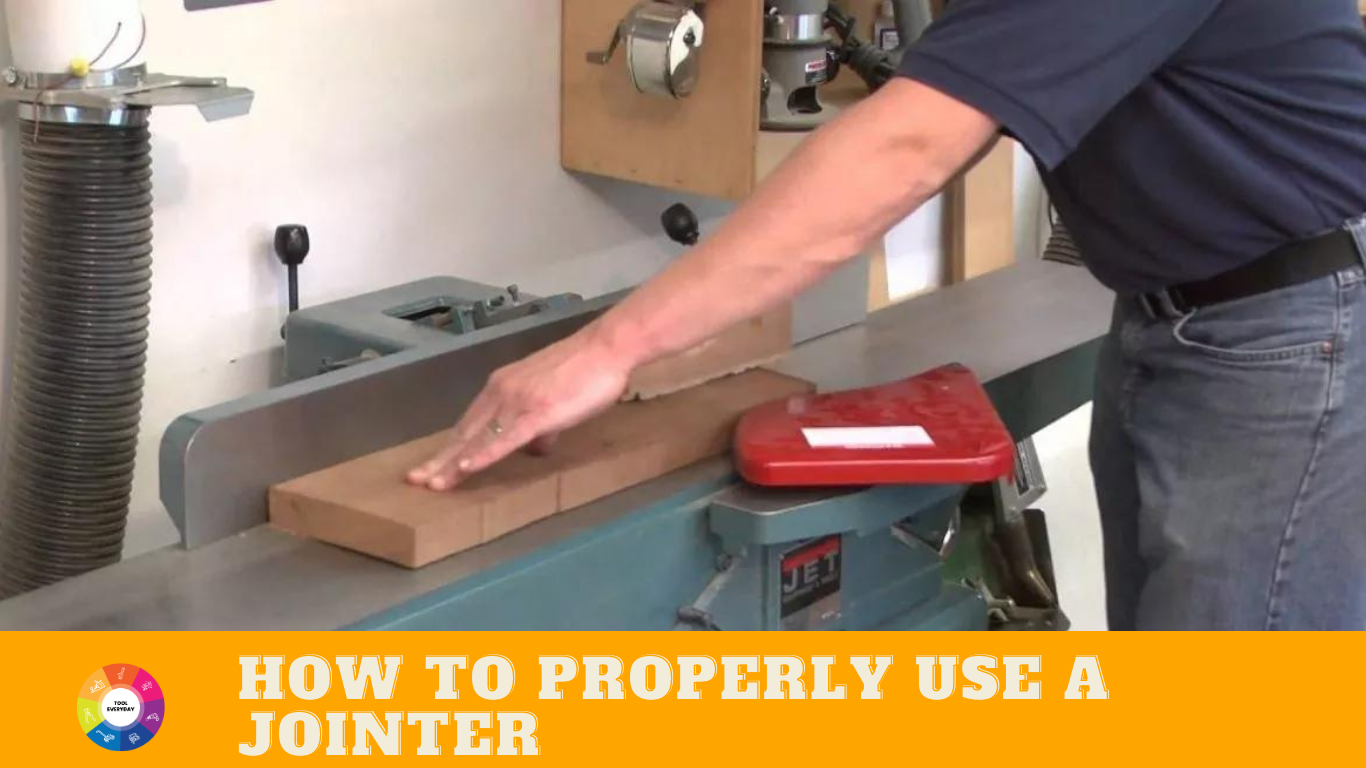
7. Carefully guide the wood through the machine.
It’s key that you guide the wood through the jointer properly.
You should lightly press the piece of wood into the fence and downward towards the bed. Do not push too hard, or you will make a bad cut. Your task is to guide and control the board as it passes through the cutter head.
Ideally, you should use a push block for more convenient feeding. A push block will also allow you to keep your hands farther away from the cutter head.
8. Saw excessively crooked wood.
Finally, for edge jointing, the wood is usually placed with the concave edge facing down towards the jointer bed. The concave edge of the workpiece provides a much better support surface for repetitive milling.
If the crook is too high, then as you are feeding the wood into the cutter head, you may experience abrupt stopping or kickback. This is both a safety and milling quality problem.
To alleviate this issue, you may cut off some of the excess material with a circular saw, table saw, or band saw. As a point of reference for sawing, draw a straight line just inside the crook and make the cut.
After this, though your cut may already be adequately straight, run the workpiece through the jointer to make it perfectly flat.